4-Step Chalkboard Fridge Makeover
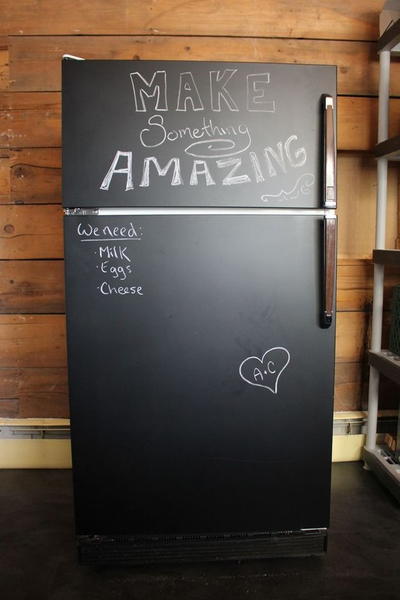
Give your fridge a quick and practical facelift with this genius home decor idea that you can complete in one day! This 4-Step Chalkboard Fridge Makeover is a quick idea to update the outside of your refrigerator and takes only an afternoon and some chalkboard paint. After giving the outside of your fridge a deep cleaning, simply remove the outside doors and give them a few coats of chalkboard paint, so that within a day, you'll have a pretty and practical fridge. This idea is a great alternative to memo boards and you can simply list your grocery needs or personal notes on the outside of your fridge. Don't spend a fortune on a new fridge when you can easily update the one you already have with this insanely easy kitchen makeover idea.
Estimated CostUnder $10
Time to CompleteIn an evening
MaterialsPaint
Primary TechniqueHome Decor

Project TypeMake a Project
Your Recently Viewed Projects
Catsitt
Oct 08, 2018
My partner and I were planning on doing a half a chalk wall in our kitchen for notes and whatnot but I love the chalkboard fridge idea more than the wall. This is a super cool idea. Are chalk spray cans easy to work with? Is it messy when working with it?
flowergirl
Aug 23, 2018
This is super cool. This chalkboard paint comes in a spray can so it's makes this upcycled incredibly fast. Chalkboard crafts are cool and functional, I see so many creative things people draw on their fridges online. If you want your kids to enjoy some non-electronic play time this is all you need to get their creative juices flowing.
Cheryl Y
Aug 20, 2018
I love this idea, What a great way to give a old fridge a makeover. This is a clear complete step by step way to make your fridge a large chalkboard. I so need to do this on the fridge in our game room. A great way to keep score and after the game, just wash it off. So have to find the spray paint. Thank you so much for sharing this free makeover idea.
jadoredior
Aug 03, 2018
I really love this idea so much, and at first, it seems like it would be such a big undertaking and really time consuming but this tutorial is really simple. I want to try this out ASAP.
Report Inappropriate Comment
Are you sure you would like to report this comment? It will be flagged for our moderators to take action.
Thank you for taking the time to improve the content on our site.

