DIY Garden Markers

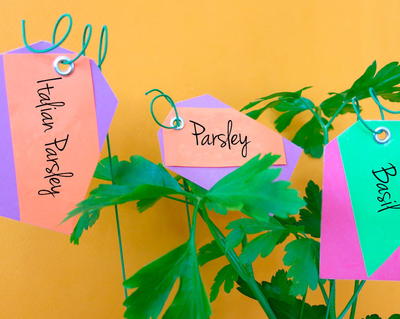
Keep your garden organized with these DIY plant markers. This garden markers DIY project will show you what you planted where, so you can keep tabs on the growth of your plants. These tags are water resistant, so you won't have to change tags multiple times in a growing season to ensure you keep track of your garden. This simple plant marker project takes less than an hour to procure an assortment of bright tags to keep your garden neat and orderly. You'll never second-guess which plant you're looking at again with these handy garden row markers.
Estimated CostUnder $10
Time to CompleteUnder an hour
Primary TechniquePaper Crafts

Project TypeMake a Project
Materials List
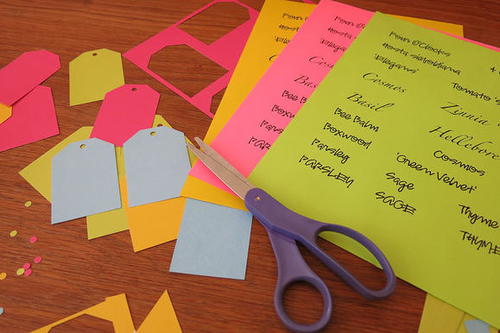
- Cardstock
- Wire
- Permanent marking pen
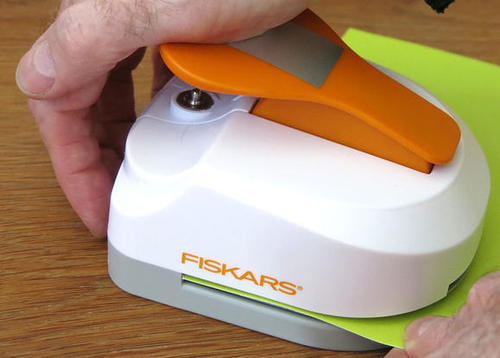
- Simple Tag Maker with Built-in Eyelet Setter
- Non-stick Scissors (8")
- Garden Multi-Snip with Sheath
Instructions:
-
Insert a piece of cardstock into the tag maker and press down on the lever to punch out a label. You can make labels all one color, or in many colors. Each label is two inches by three, leaving you plenty of room to write the name of plants.
-
Insert the tag into the small slot in the front of the label maker and press on the lever again, to punch a hole. (Note that if you are going to laminate your labels, you should wait until after they are laminated to punch holes.)
-
Have fun with the plant names on your labels. Type the plant names on a single document page, and print them on colored paper from an office-supply shop. Leave plenty of space between names so you can cut them out easily. You can also cut out plant names (or pictures) from a seed catalog.
-
Use just a drop of glue to place the plant name on the label.
-
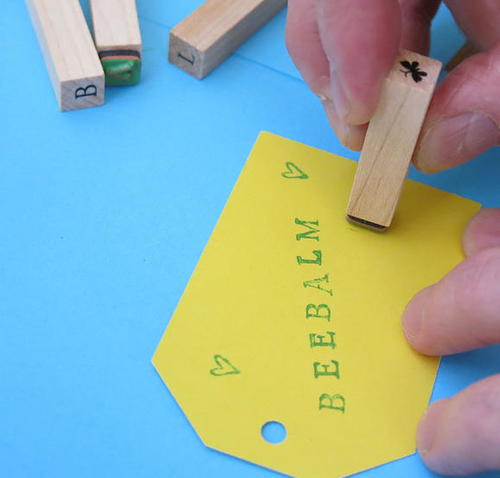
You could also write the names of plants on each label by hand, of course, or use a set of rubber alphabet stamps to spell plant names. Choose a contrasting ink color and let the ink dry well before laminating.
-
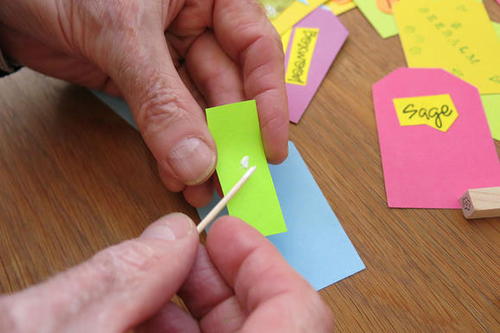
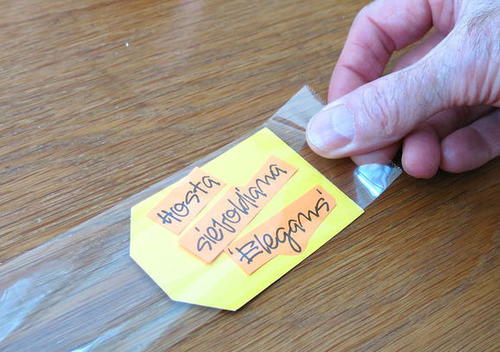
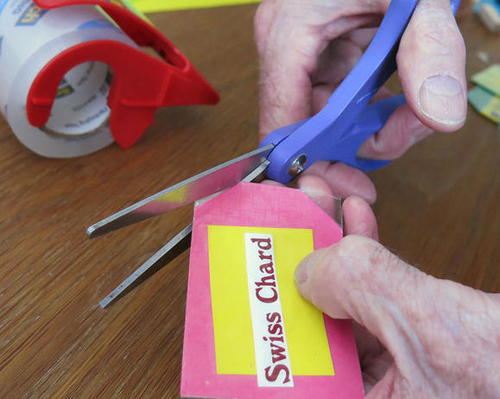
Pull off a piece of tape about seven inches long and carefully place it over the front of the label. Pick up the label and fold the tape over onto the back, where the ends will overlap slightly. Smooth the tape down with your fingers.
-
Using sharp Fiskars scissors, trim any excess tape around the label.
-
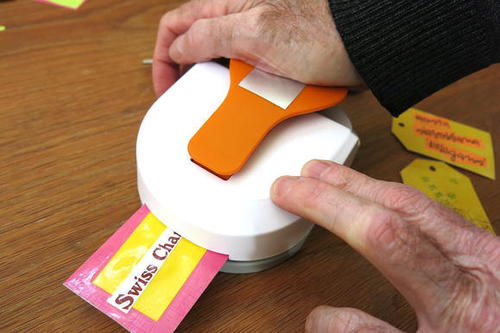
Now place the label in the small slot in the tag maker and punch a hole.
-
Then place a steel eyelet in the hole, set them together on the peg in the Tag Maker, and push the handle down to fasten the eyelet to the tag.
-
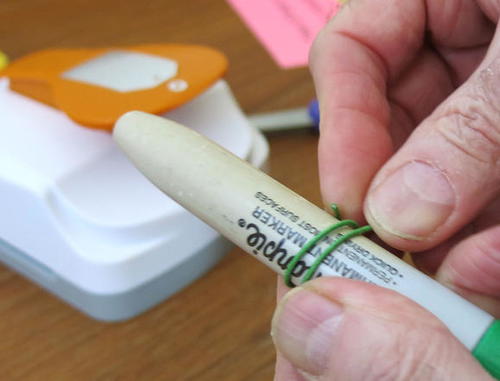
To hang your tag, wrap a piece of floral armature wire two or three times around a marking pen to make a coil.


Read NextDIY Garden Spinner